Business Case:
Do you want to improve subscriber engagement? Are you fed up of Low open rates or low click rate? Don’t worry and relax. We have a best solution for you that lets you increase user engagement, increase conversion rates and create impactful content.
This all can be achieved by just using a simple approach of A/B testing before sending the emails to your users.
Solution Approach:
We will create an A/B test using email studio and select the type on which you want to perform test viz.
- Subject Line
- Emails
- Content areas
- From Names
- Send dates/times
- Preheaders.
Then, select the recipients to whom we want to send the A/B test email.
Set a winner criteria based on the highest unique open rate, highest unique click-through rate.
Send winning emails to the remaining subscribers.
Solution:
A/B Testing is a market testing method in which you send two versions of your Marketing Cloud Email Studio communication to test audiences from your subscriber list.
Track which version receives the highest unique open rate or highest unique click-through rate and send that version to all remaining subscribers.
Testing these variables over time allows you to optimize your email campaigns to deliver more targeted and relevant messages to your subscribers. Through automating the testing process, you can save valuable time and resources.
Steps to be followed to perform A/B Testing:
- Go to Email Studio and click A/B Testing tab.
- Create A/B Test and enter a name and description.
Note:
- The maximum limit of 62 characters can be used for Name and 512 for Description.
- Do not include symbols such as: ” < > / \ | : *>
- You can run an A/B test on an email that contains dynamic content, a dynamic subject line, or AMP script. The exception is a dynamic subject line when you are running a subject line A/B test and testing two emails.
When testing two emails that contain a dynamic subject line, the default subject line is always used.
Use AMP script in the subject line instead of dynamic content. If you experience issues, contact Global Support.
3 . Select TEST TYPE on Test Management tab. You can test based on Subject lines or emails or content areas or from names or send dates/times or preheaders. In this scenario we are testing based on “Subject line”.
- Click on Subject Line
- Choose the email from Content builder
- Enter the two different subject lines in Subject Line A and Subject Line B
- Click Next

| TEST TYPE | DESCRIPTION |
| Subject Line | Create 2 different subject lines and track which performs better. Each subject line has a 256 character limit. |
| Select 2 different emails and track which email send performs better. | |
| Content Area | Select an email that contains at least two different content areas and track which content area performs better. |
| From Name | Create 2 different from names and track which email send performs better. You can select an existing from name in your account, or manually enter a From name to use. To add more from name options to your account, create an additional user. |
| Send Time | Select 2 different dates and times to send and track which time performs better. |
| Preheaders | Create 2 different preheaders and track which preheader performs better. |
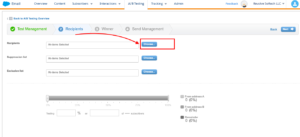
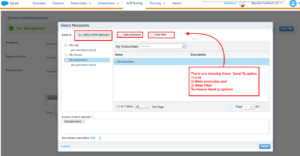
4. Now, Choose recipients on Recipients tab. You can select subscriber lists, groups, or data filters, or choose a data extension. The approximate number of subscribers selected is displayed.
Note:
- Data extension targets of an A/B test send can’t be modified after reaching the Initialized stage, when jobs are created and initialized.
- Also, the time that A/B tests are initialized depends on the test type selected.


5. Next, click on Winner tab and set the winner criteria.
- Determine winner by Higher unique open rate or Higher unique click-through rate.
- Specify the evaluation period after which the system declares a winner. You can measure in hours or days. When running a Date and Time test, the test duration doesn’t begin until the system sends the Condition B email.
- When running a subject test on a classic email, select whether to have the winning subject line save back to the original email.

Click on Next.
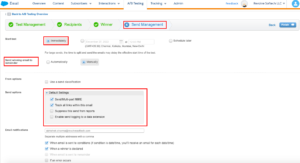
6.On Send Management, choose the details as in the below screenshot.

7. Confirm A/B Test Details and click on Finish.

The system randomly selects which subscribers receive test A and who will receive test B emails. Send the winning version to the remainder of your subscribers automatically when the winner is determined or manually perform the send.
Important points to consider –
- A/B testing is a part of the test process and you are sending the emails to real subscribers, so ensure that you send a polished, final product.
- Ensure that you perform test sends before using A/B testing.
- Use A/B testing before you execute your final send.

Best Practices For Salesforce Marketing Cloud A/B Testing-
These strategies can help you make the most of your SFMC AB Testing campaign:
- Always have a valid hypothesis.
- Change only one element at a time.
- Ensure that the numbers you are testing are big enough to enable reliable (further) analysis. A test with fewer than 500 subscribers may not be statistically significant.
- If there are more than 50,000 subscribers, send to 5% per condition and 10% if the number is less than 50,000.
- To achieve good results set your evaluation a bit long. Wait at least 24 hours before declaring a ‘winner’.
- Do not update the data source; keep the data static to prevent any problems with the test.
Everything looks good, but can we use A/B Testing In Journey Builder?
No, A/B testing is more of an Email Studio functionality so the idea is not really applicable using Journey Builder.
However, a workaround for this is available, using Random Split. This activity divides SFMC contacts into random groups in a configurable number of paths (up to 10) in Journey Builder. The marketer can specify a distribution percentage of contacts for each path. Journey Builder will ensure that the sum of path percentages always equals 100.


