

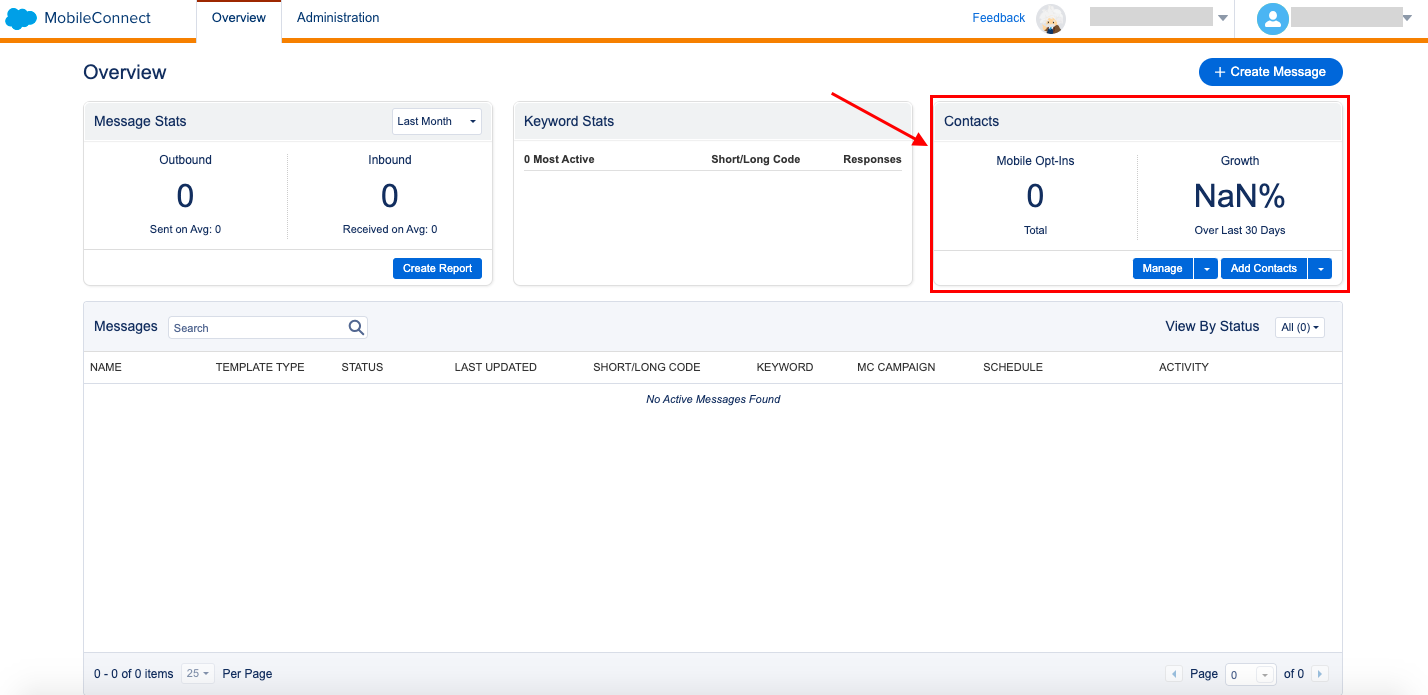
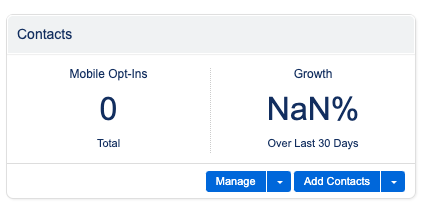
Contacts in Mobile Connect:
A “contact” is a data record that contains contact information (like phone number) and to which other relevant data may be related (like personal details, demographic information, behavioral data).
Use the Contacts feature in Marketing Cloud MobileConnect to view and interact with MobileConnect-related contact information for a person or contact.
Create Contacts Manually
Create MobileConnect contacts manually. Contacts created in MobileConnect are also created in the Contacts app.
-
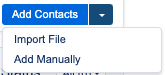
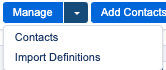
Click the Manage arrow next to Add Contacts and select Add Manually.
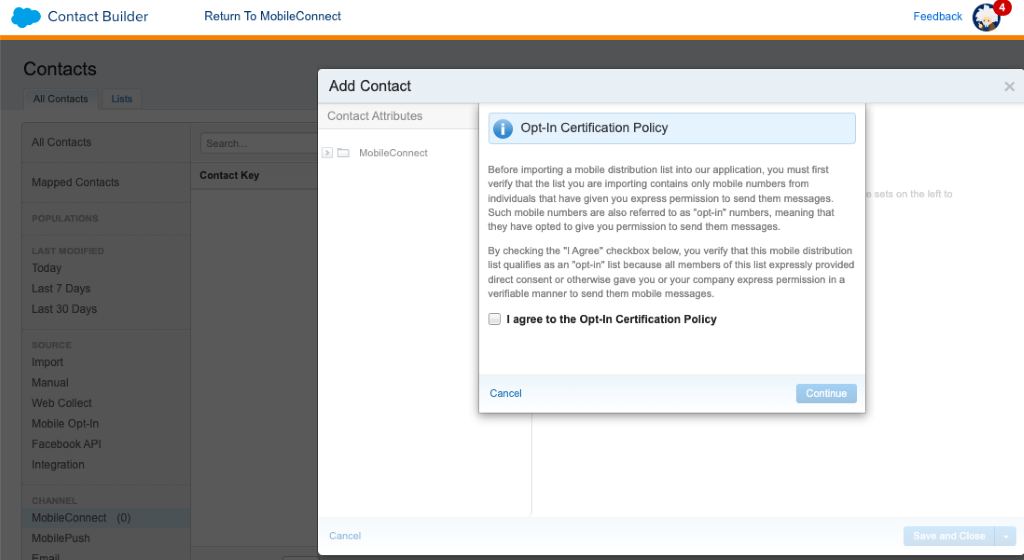
Check the checkbox to agree the opt-in certification policy.
- Enter the contact’s mobile number as the Contact Key.
- Contact Key, Locale and Mobile Number is required.
- Enter a two-character country code (i.e. us, in)for the Locale.

- To enter a secondary mobile number, change the mobile number field. This field is automatically populated with the Contact Key.
- Select any additional MobileConnect Demographics fields and enter information for the MobileConnect Demographics attribute group.
- Save and close, or click the arrow and select Save and Add Another Contact.
Import Contacts into MobileConnect:

- In the overview Contact Builder section, click on “Add Contacts”.
- Choose the destination for the imported contacts.
- Select the List where the contacts will be imported.

- Upload the contact file. Before doing so, ensure that you have opt-in permission from the contacts in the file.

- Click “Next”.
- Associate the contacts with the relevant application.
- Click “Next”.

Confirm SMS Opt-In Subscriptions:
creating an SMS Opt-In message, verify that MobileConnect correctly creates the subscriptions.
-
- Navigate to the MobileConnect overview screen.
- Open the Contacts application.
- Click “Manage” under Contacts.
- Search for the specific mobile number.
- Click the mobile number.
- Check the subscription status; it should be “Subscribed”
Contacts uses a system table to store this information along with an automatically incremented identity column used for the primary key.
Add attributes for your contacts to include custom information for sending messages.
Use case: Send an outbound personalized message using Automation Studio
A client intends to send regular reminders to their subscribed customers about ongoing or upcoming events. To achieve this, they create an outbound message in MobileConnect for each event, incorporating personalization strings. At the time of sending, MobileConnect dynamically replaces these personalization strings with relevant customer attributes, ensuring that each subscriber receives a personalized message. Automation Studio manages the delivery of all outbound messages, ensuring that the correct message is sent out at the appropriate time.
Solution:
Use Automation Studio and the MobileConnect outbound message template to send personalized messages in Marketing Cloud Engagement automatically.
Steps to build an automation:
-
Create a New Keyword:
- Navigate to MobileConnect within Marketing Cloud.
- Under the Administration tab, select the customer short code (sample code 12345).
- Click Create Keyword and enter the desired keyword (e.g., “EVENT2024”).
- Save the keyword.
-
Create an SMS Message:
- In MobileConnect, select a template for your message.
- Name the message.
- Choose a short or long code.
- Optionally, select a From Name (which sends the message as if your business is one of the customer’s contacts).
- Acknowledge opt-out availability.
-
Select a send method:
- Automation: Create a message that sends via an automation in Automation Studio.
- Define the audience (using a data extension, list, or creating a list).
- Enter the message content.
-
Specify the delivery method:
- Send Immediately: For contacts who have opted in.
- Future/Recurring: Schedule for a future date or recurring schedule.
- Configure advanced options (such as time zones, send throttling, etc.).
-
Automation Studio:
- Build the new automation select the source schedule.
- Drag a Send SMS activity into your automation.
- Select the SMS message you want to send and define when it should be sent.
In results, whenever the automation runs updated audience will receive the appropriate message on the scheduled time.


