
Business Case:
If you want to send an email from Marketing Cloud to the lead when the lead is created and is not converted into Salesforce CRM, you can use Journey Builder in Marketing Cloud. When the Marketing Cloud lead is integrated with Sales/Service Cloud using the Marketing Cloud Connector, the journeys can be triggered whenever an object record gets created.
Now, you would be wondering How?
Let’s work on a solution to achieve this.
Solution Approach:
- First, we will create an automation that will update the data in the Standard data extension automatically every 15 mins from the Synchronized data extension.
- After this, we will create an attribute group to use contact data(real-time data) in the decision split.
- Further, Journey will be created using different activities to send emails to the not converted leads.
Solution:
Note: Marketing Cloud Connector should be installed to fetch the data(Lead, Contact) from Salesforce CRM.
Step:1 Create an Automation:
Create an Automation for updating the Standard data extension every 15 minutes from the Synchronized DE (a Standard data extension is created for the lead that gets updated from the Synchronized DE).


Step:2 Create an Attribute Group
In the Marketing Cloud contact builder, we create an attribute group to use in decision split as contact data.
Steps to create an attribute group.
- Go to Audience Builder and select Contact Builder
- Select Data Designer and create an Attribute Group
- Add Name and then link Data Extensions (Lead)
- Relationship between Contact Key, Lead_CRM_Data
- Contact Key Lead_CRM_Data: One-to-One
Step:3 Configure Journey in Journey Builder
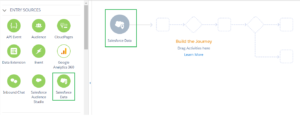
- Select the entry source as Salesforce Data.
Salesforce data: The Salesforce Data Entry Source in Marketing Cloud operates in real-time. You can think of it as a trigger in Salesforce that performs an after-insert or a trigger in Salesforce that performs an after-insert or update action that injects the contact into a Marketing Cloud journey.
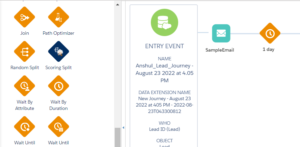
- For Salesforce Data, choose Salesforce Data Event.

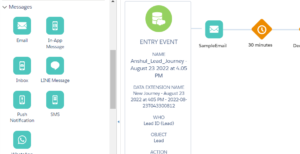
- SELECT OBJECT: Under define entry source, select the object as Lead. After selection, it will display a set of ID-related fields (based on the lookup with User/Contact/Lead/Person Account Objects).
- Select an object (1) Lead (2) Lead ID and then click on (3) Next button.

Note: Once the entry source is created you cannot edit it.
- ENTRY CRITERIA: In the entry criteria, select the Checkbox [Is Created].
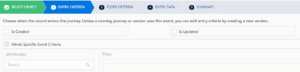
Note: This event can only be edited in a new version when its previous versions are not running.
- FILTER CRITERIA, ENTRY DATA: In Filter Criteria and Entry Data (add nothing) and click Next.

SUMMARY: This section displays all the details selected in previous tabs. Click Done.

Note:
- You cannot edit this selection after creating the entry source. Although, you can add the additional fields in the new version.
- If you are using an email activity, it is important to select the Email Address that is used in the journey settings to send out the communication.
Email Activity: Select Email from Message Activity and drop into the flow of Journey.
- Fill in the details as (1) Activity Name, (2) Description, and then (3) Select Message.

- Select a message from content builder messages.

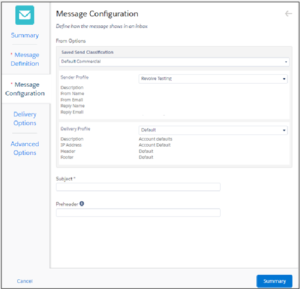
In Message Configuration fill in the details –
- Send Classification: Select Default Commercial
- Select Sender Profile
- Delivery Profile Select Default
- Enter the Subject
- In Delivery Options fill in the details –
- Select Publication List as All Subscriber
- Tracking: Select the Checkboxes Track Clicks, Retain Send Log Data, and Send Tracking Results to Sales Cloud.

- Wait By Duration: Select and drag Wait By Duration from flow control and drop it before email Activity in the Journey Flow. Click on the activity and set the duration to 1 day.
- In Decision Split Path 1 click on Edit Button.

- Select Contact Data in the attributes panel.

- Select the attribute group that has already been created in the previous step (In this case, it is Journey Attribute Group 1).
- After selecting Lead_CRM_Data from the attribute group Journey Attribute Group 1, select Id and use it in the Filter Criteria. Match the Id with the journey data Id. Then from Journey Attribute Group 1, select IsConverted and set it as false, and click on the Done button.
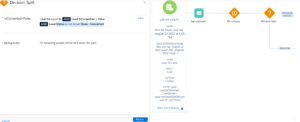
- In this step, the decision split checks whether the lead is converted. If ‘IsConverted‘ is true, the lead will exit the journey. ‘IsConverted‘ is false, we can again send the email.
- After sending the email we can use Wait By Duration activity (1 day) then Again add Decision Splits & add the same criteria 3 times as above.
Note: In our use case, we have checked the criteria three(3) times and waited for one(1) day before sending another email. You can check the criteria n number of times, and the wait can be n number of days.

- Save the Journey and activate it. After activation, you can create a lead in Salesforce CRM and check the journey. As soon as you create a Lead it will show in the journey. All the conditions will then be checked and emails will be sent accordingly.


