

Overview
Implement Content Approval to ensure that the email content created is reviewed and approved before it is available to be sent to subscribers.
Let’s take an example:
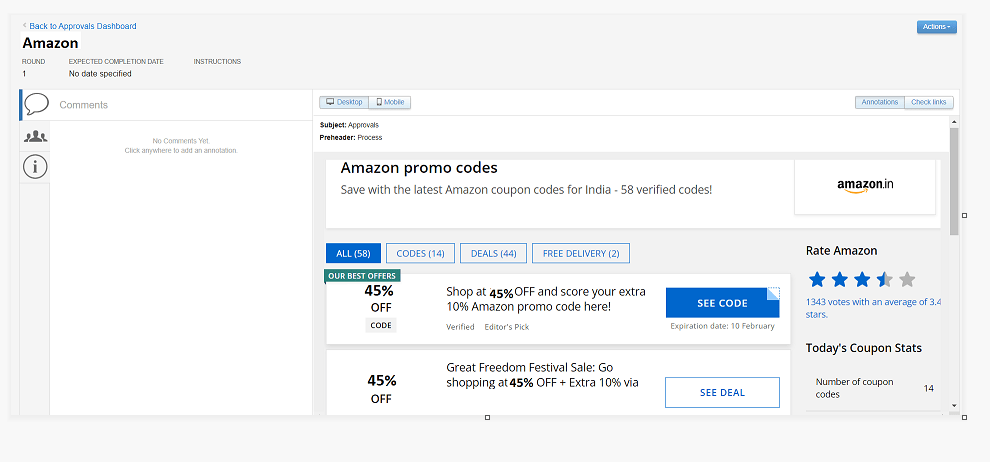
Amazon has created a new campaign in which Amazon will give a 45% discount coupon to everyone who signs up between December 15th and December 25th.
In this example, we understand how to send discount coupon email content to the final approver and after the approval email is sent to the new users, the following are the steps to follow content for approval:
- As we have created content block with the discount coupon, so we go to the approval process “Start Approval Process”.

- You click on “Start” button will provide the details of approval to review and approve/ reject.
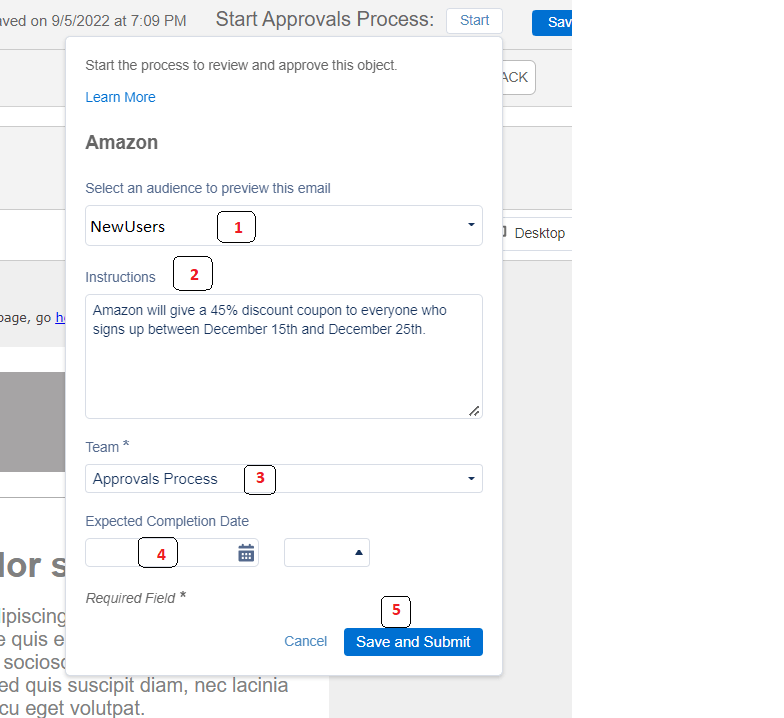
- Audience[1]: Select the audience from the drop-down, the type of audience you want to send an email to (according to our example we are selecting new user data).
- Instructions[2]: You can leave any instructions for the reviewer to review and suggest any changes or any context you think will help Approver.
- Team[3]: We will select a team from the drop-down(It’s required), a team that we have already created in the approval setting(Approval setting creates a team in which team members and their roles are decided)
How to make someone an approver?
Here are the following steps to make someone an approver:
- In the Marketing Cloud, hover over your username and click on Setup.
- Under Feature Settings | Content Builder, click Approvals Settings.
- Click Create a Team.
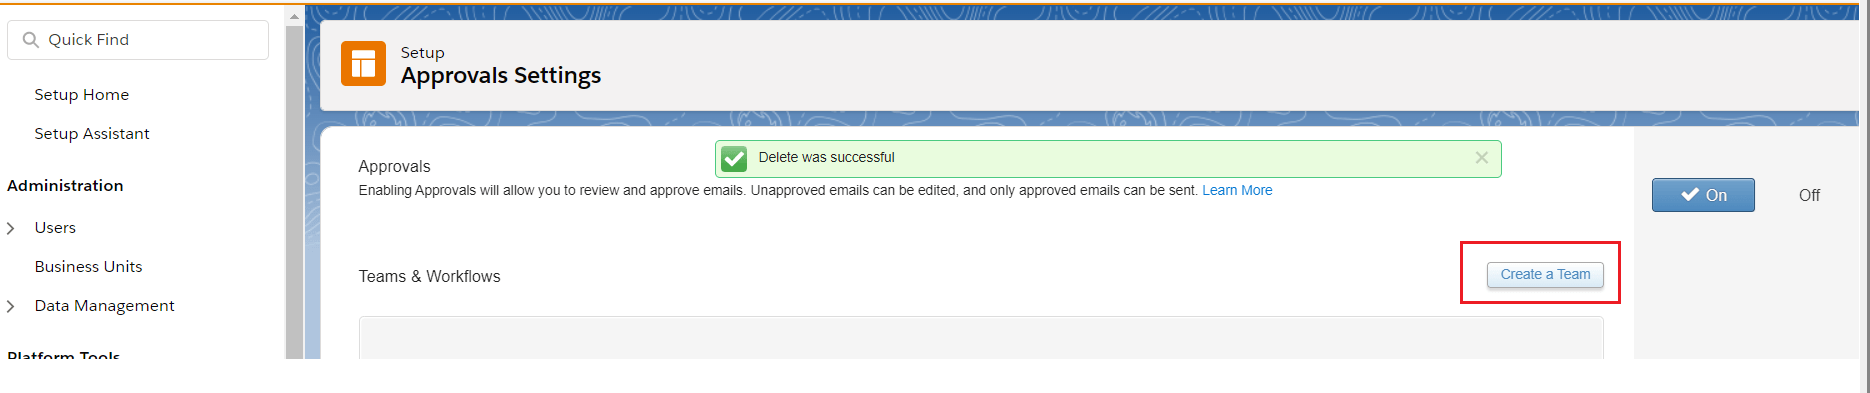
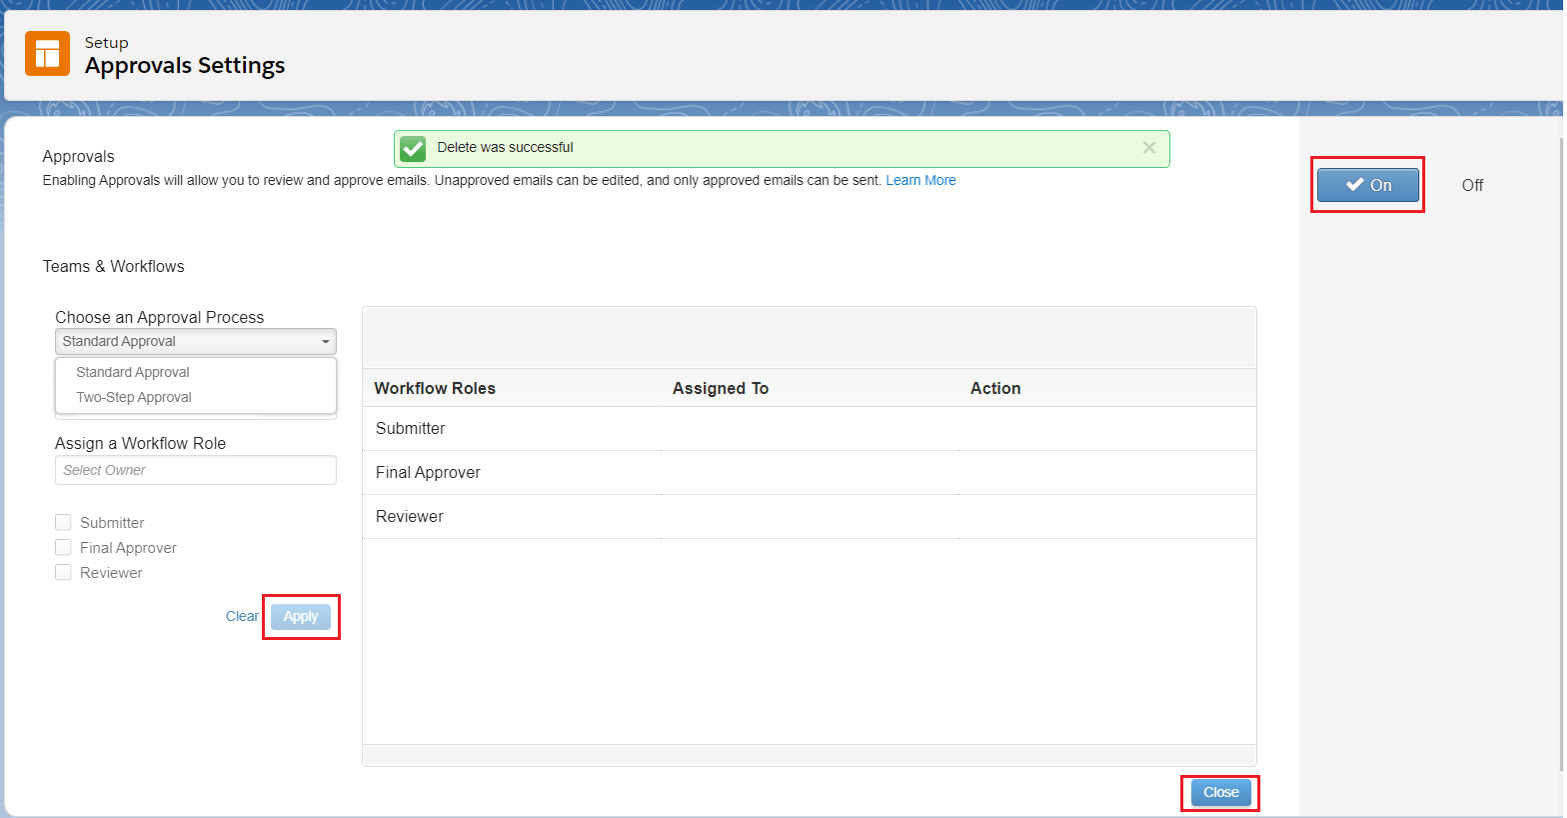
- Under Teams & Workflows, choose an approval process, there are two type of approval process
- Standard Workflow – Submitter, one or more Reviewers, Approver
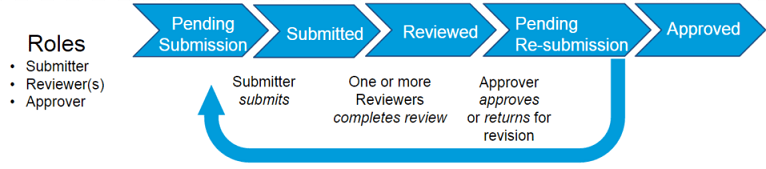
- Two-Step Workflow – Submitter, Approver


- Standard Workflow – Submitter, one or more Reviewers, Approver
- Optionally assign a team name.
- In the Assign a Workflow Role field, search for users and check the roles that you want to assign.
- Click Apply.
- Click Close.
- Click On to enable Approvals for Marketing Cloud.
- Click Confirm.
- Expected Completion date[4]: Assign the date and time on which we expect the approver to approve the content.
- Click on “Save and Submit”[5], after submitting, this will send a notification to the approver to review and approve the content. (If the final approver wants to change before sending anything in the content, then he can revert the submitter such as increase or decrease the percentage of discount or increase or decrease the interval of the date.)
The team members listed as content approvers need to approve the email content before it is ready to be sent.

As you notice in the screenshot above:
- The email is not sent for approval yet, so it’s not available to be sent.
- The email is approved by the reviewer and can be used for sending.
- The email is sent for approval but not yet approved so cannot be used for sending.
You can also check current status(Approved/Submitted) from the approval dashboard .

You can take further actions on your submitted approval requests from this screen
- Withdraw: Withdraw the approval request if the email is not to be used or if changes are required.
- Edit: You can edit your approval request by making changes to initial submissions.
- Delete: You can delete the approval from the approval dashboard.

Approvers have options to add comments, ask questions, Approve or Reject from the approval Dashboard.
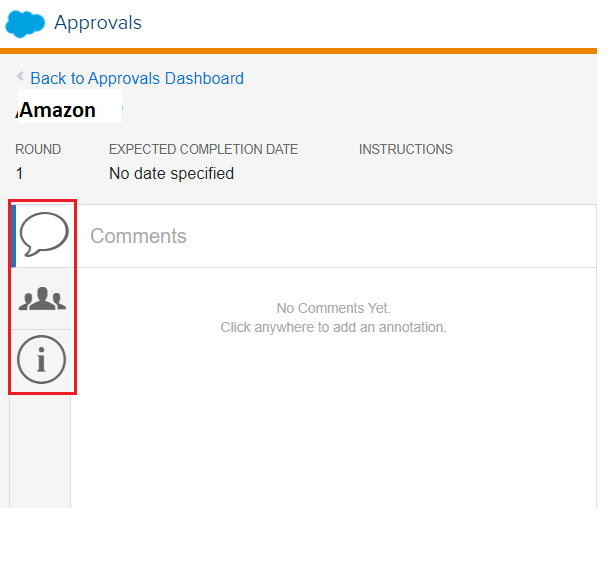
- Comments: Approver can add comments
- Audience: Approver can select the audience
- Information: Approver can view the review status and also view the team and their roles
- The approver can review the email message and they can either approve or decline the email message.
- If the approver approves the email message, it can be sent to any audience in the account.
- If the approver declines the email message, the reviewer must edit and resubmit the email message until the approver finally approves the message.
NOTE: You must contact your Account Executive to enable Approvals. To enable Content Builder Approvals, in the app switcher, hover over your name and click Setup. Search for Approvals Settings and toggle the ON/OFF button to ON.


