
Overview:
In this post, we’ll explore how the Ingestion API empowers external systems to seamlessly send data into Salesforce Data Cloud, even when prebuilt connectors or native data streams aren’t available. This flexibility means that organizations can still integrate valuable data from diverse sources—without waiting for custom connectors—by leveraging a direct and efficient API-based approach.
We can ingest data into Salesforce Data Cloud using the Ingestion API in two primary ways:
- Bulk ingestion – Ideal for sending large volumes of data at scheduled intervals, such as uploading CSV files.
- Streaming ingestion – Designed for real-time data delivery, where updates are pushed instantly as they happen, typically in the form of JSON events.
Pros & Cons of Ingestion API:
| Pros of Ingestion API | Cons of Ingestion API |
|---|---|
| If the system is not directly supported by Data Cloud, you can still send data. | Unlike a simple file upload, you need developers and integration tools to call the API. |
| You can send data instantly as events happen or in bulk periodically. | If API calls fail, you must have a way to retry or monitor. |
| It can handle large data volumes without manual uploads. | APIs may have volume limits depending on your license. |
Use Case: Streaming Ingestion
We’re working with an Order Management System (OMS) that tracks all customer purchases. However, Data Cloud doesn’t offer a native connector for this OMS. That leaves us with a challenge:
How do we bring customer order data directly from the OMS into Data Cloud—without relying on an intermediate system?
This is where the Ingestion API comes in. It gives us a direct path to move data from our OMS into Data Cloud efficiently and reliably.
Solution Approach:
To solve the challenge of streaming data into Salesforce Data Cloud without a prebuilt connector, we leveraged the Ingestion API. The data is received in JSON format, which we then process and map within Data Cloud.
To set up the integration, we first defined a YAML configuration file. This file helps structure the incoming JSON data and map its fields to the appropriate attributes in the Data Cloud data stream. With this setup in place, we’re able to bring in customer purchase data in real time, enabling timely insights and actions.
To achieve this follow the below steps:
Step 1: Set up the Ingestion API connector
- Go to Data Cloud Setup → Ingestion API → [Order Ingestion]
(Click New and create a new connector by giving it a name)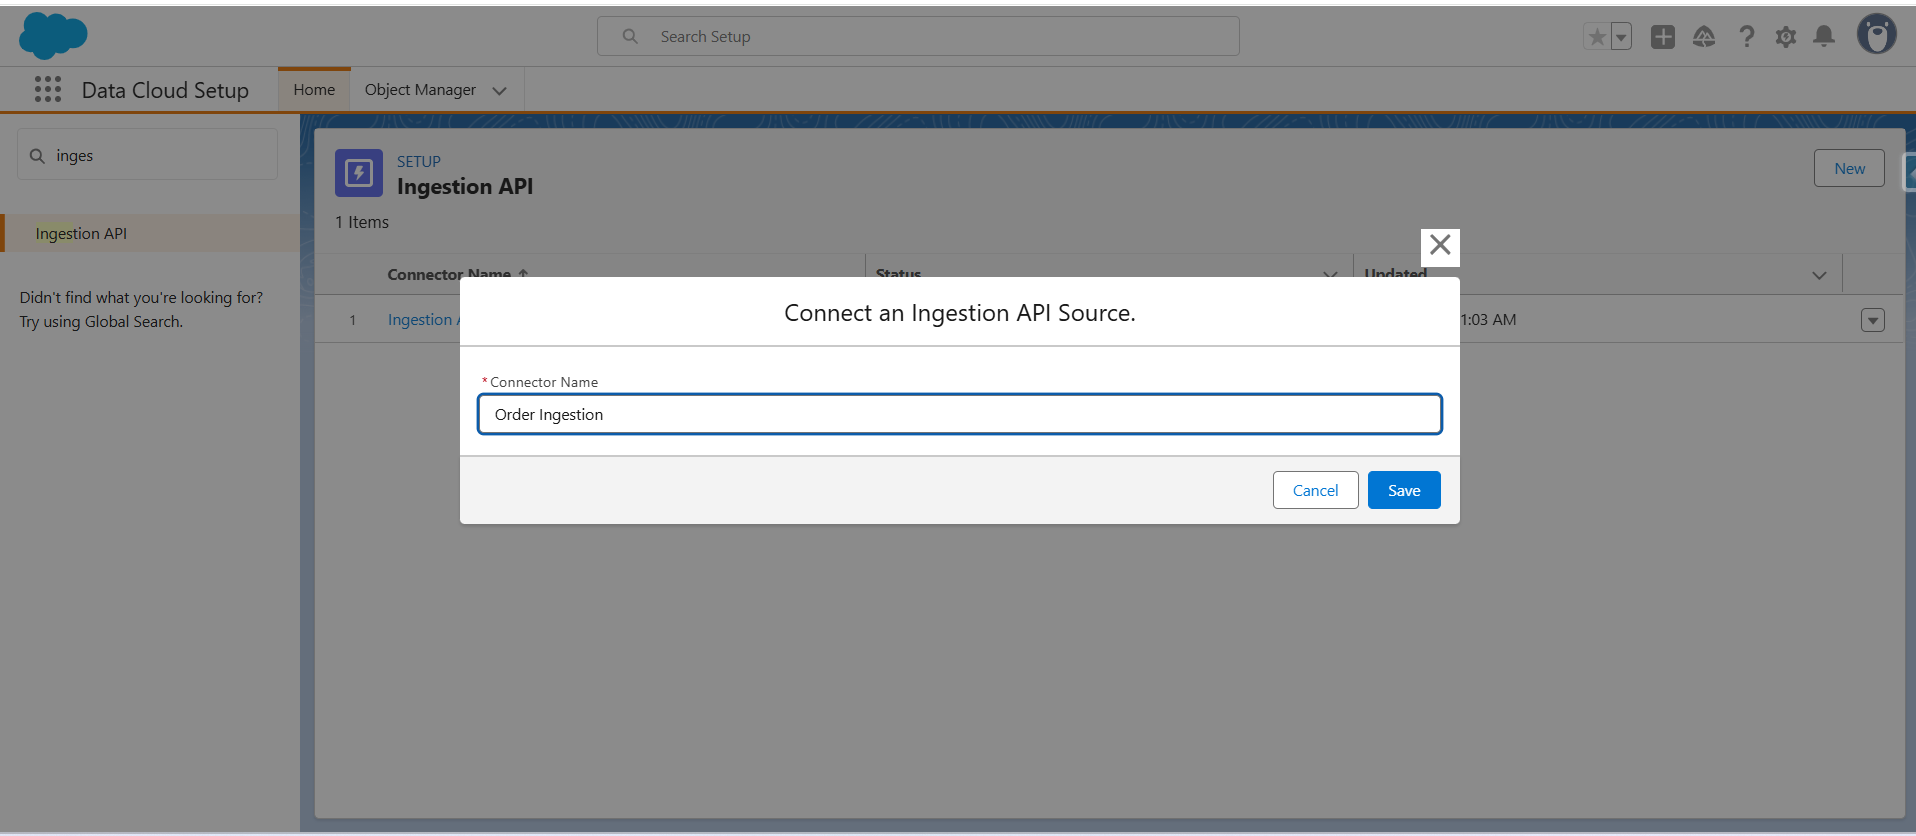
- Click Save
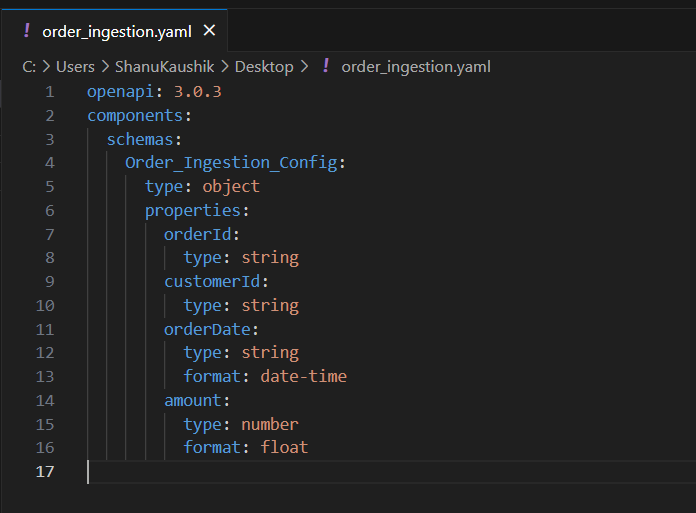
- Once the connector is created, the next step is to upload a schema file in OpenAPI (YAML) format. This file defines the structure of the data coming from the OMS, including key fields like orderId, customerId, orderDate, and amount. By uploading this YAML file, you’re essentially mapping these OMS fields to the corresponding Data Lake Object fields in Data Cloud—ensuring the data flows in correctly and is ready for processing.
Note: Below is the sample code to create a file with yaml extension.
openapi: 3.0.3 components: schemas: Order_Ingestion_Config: type: object properties: orderId: type: string customerId: type: string orderDate: type: string format: date-time amount: type: number format: float - Once uploaded, verify that objects and fields appear with correct datatypes.
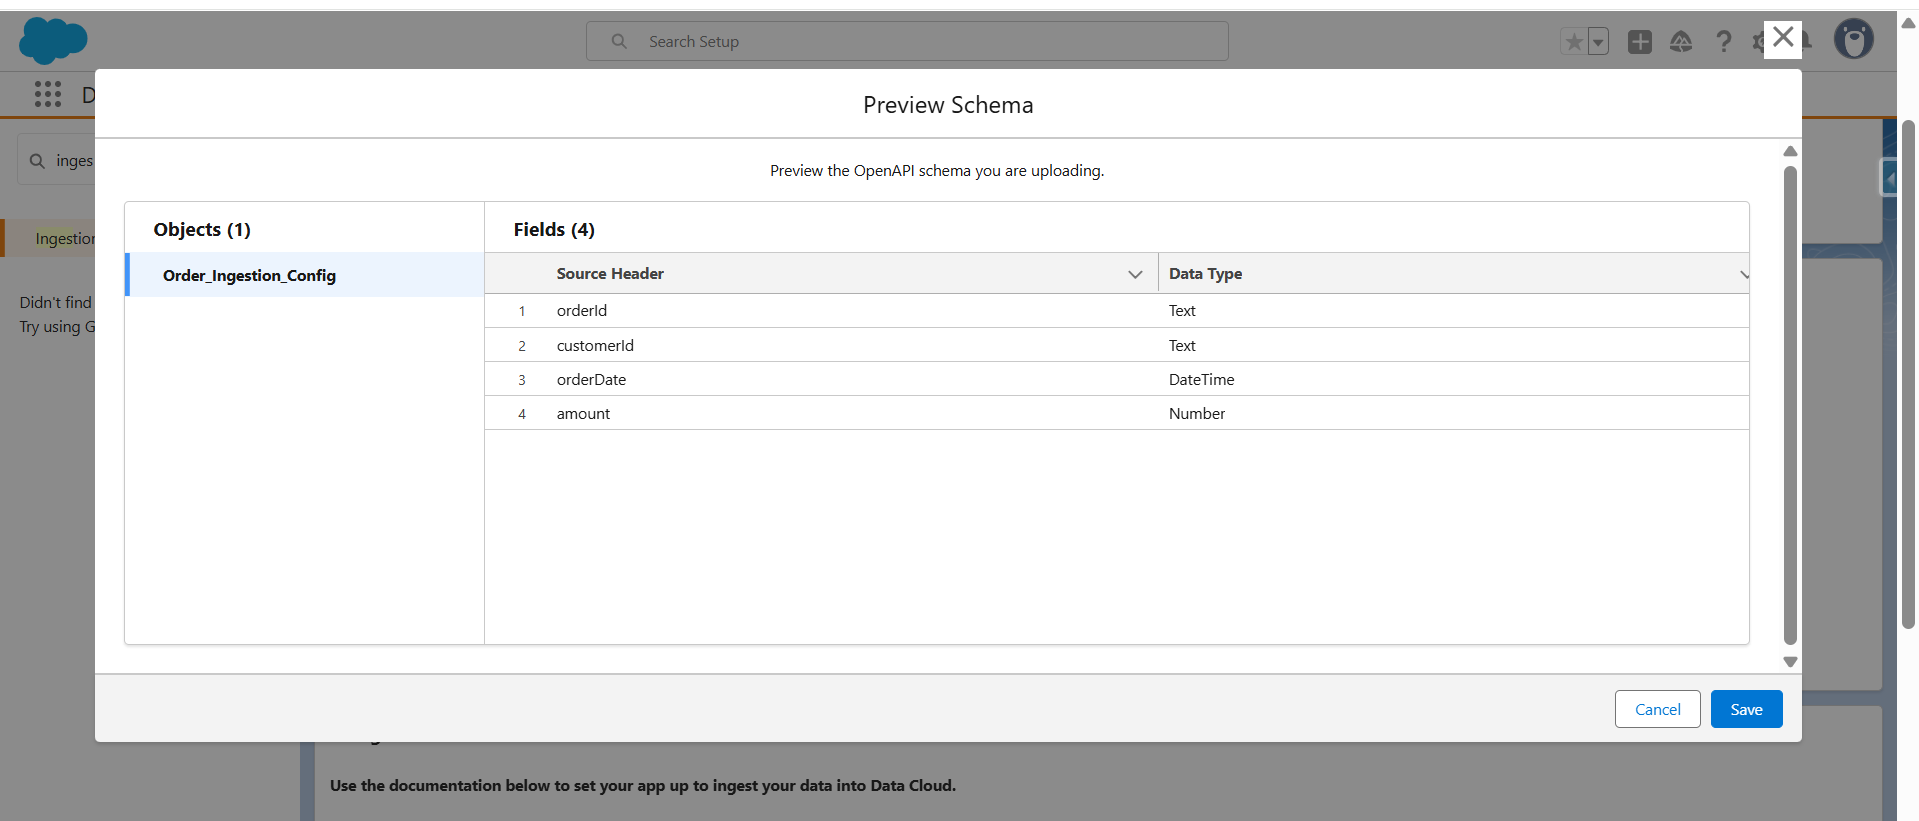
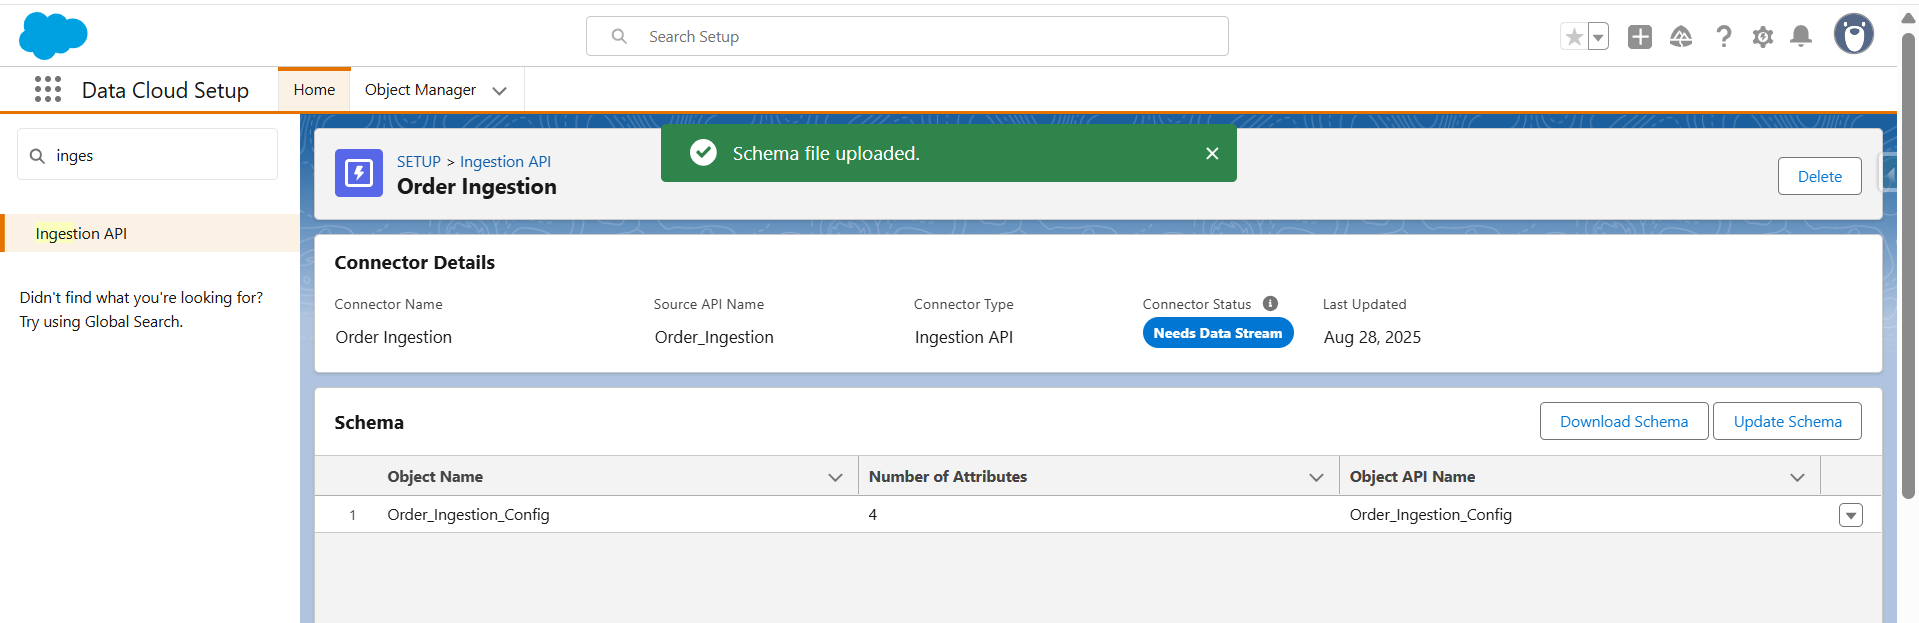
- After clicking save the file, it will be uploaded successfully.
Step 2: Create Data lake Object
- Go to App Launcher -> Data Cloud -> Data Lake Objects -> New
- Select New to create a new DLO.
- Provide the Object name that you have written in the schema in this case object name is Order_Ingestion_Config, and click on Add Field button to add the field which you have described in the YAML file.
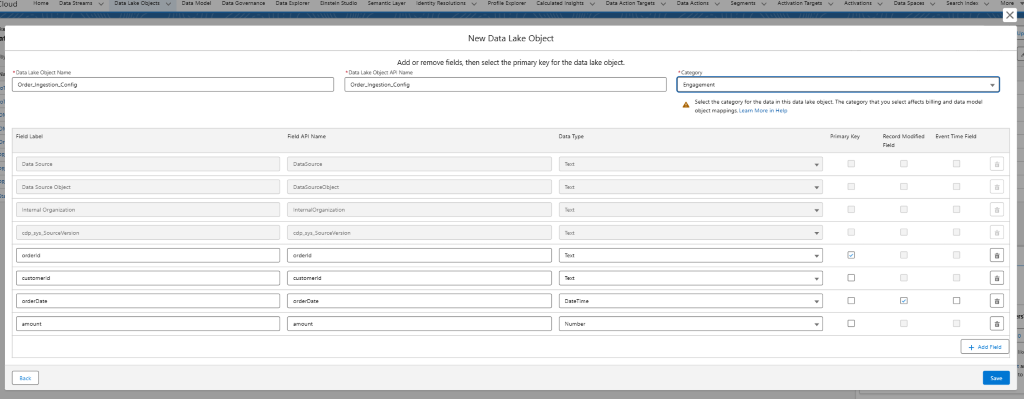
- Click Save.
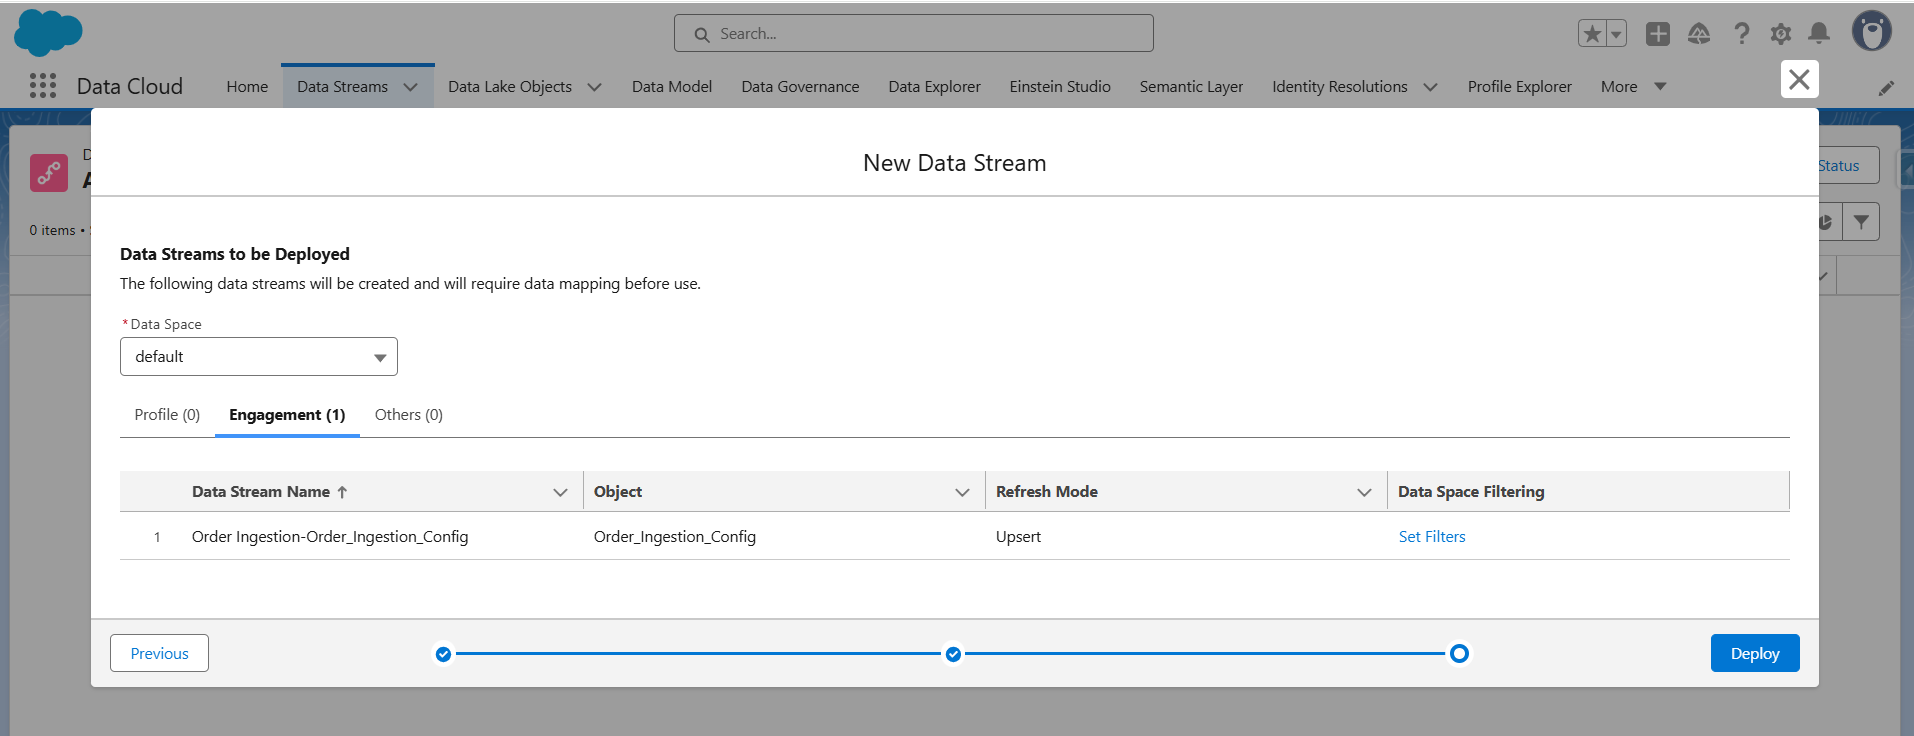
Step 3: Create and deploy a data stream
- Go to App Launcher -> Data Cloud -> Data Streams -> New
- Select Ingestion API as the source.
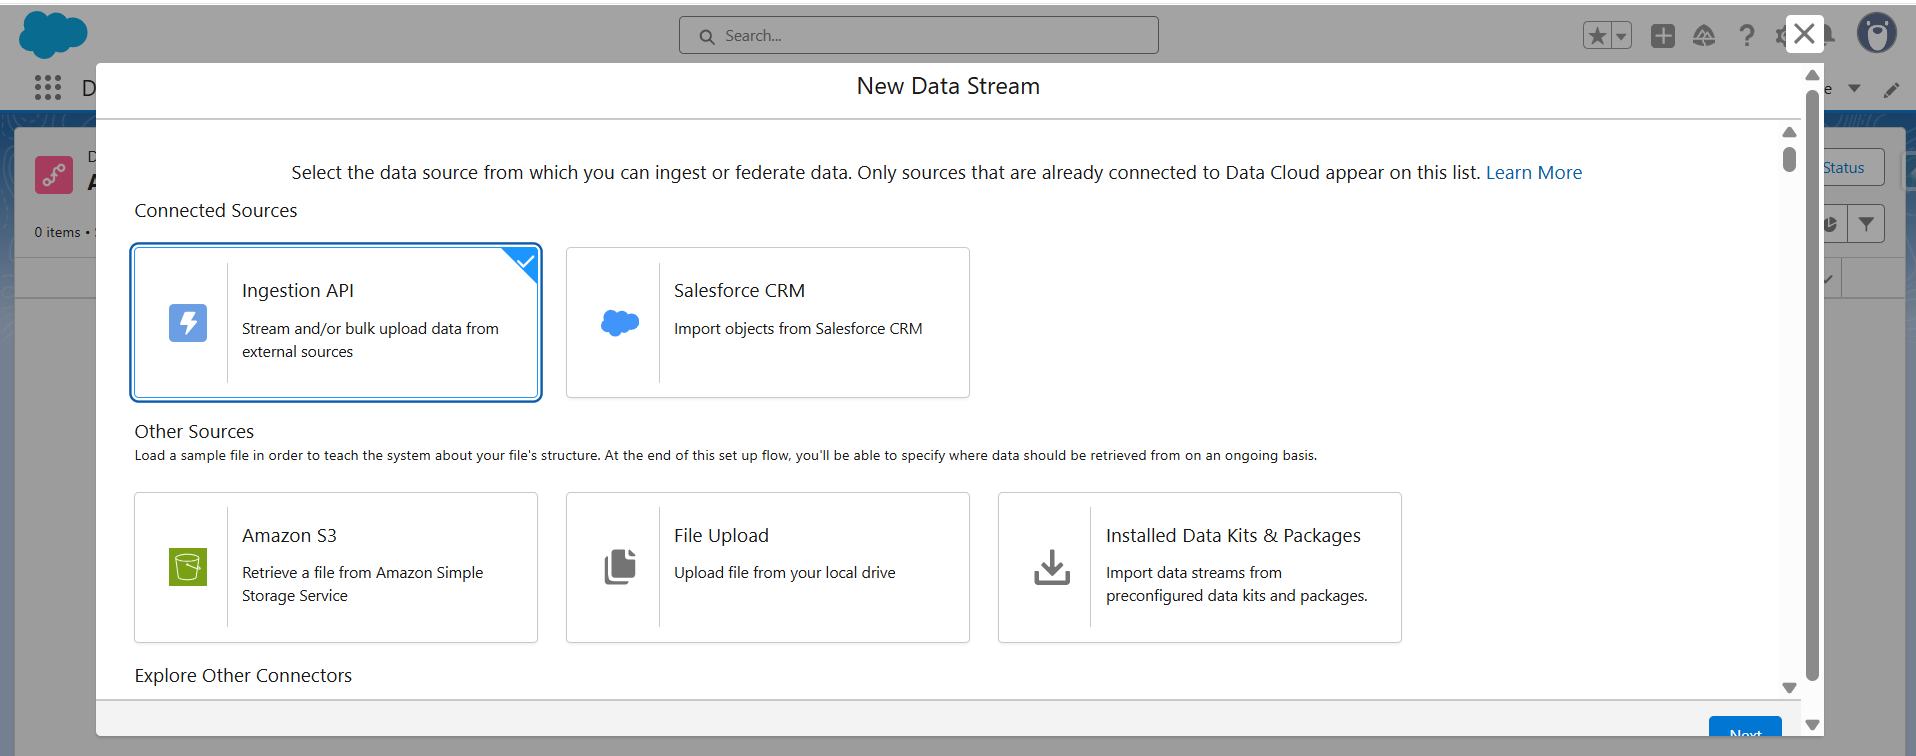
- Choose the connector created in Step 1 (Order Ingestion).
- Select the ingestion object (e.g., Order_Ingestion_Config).
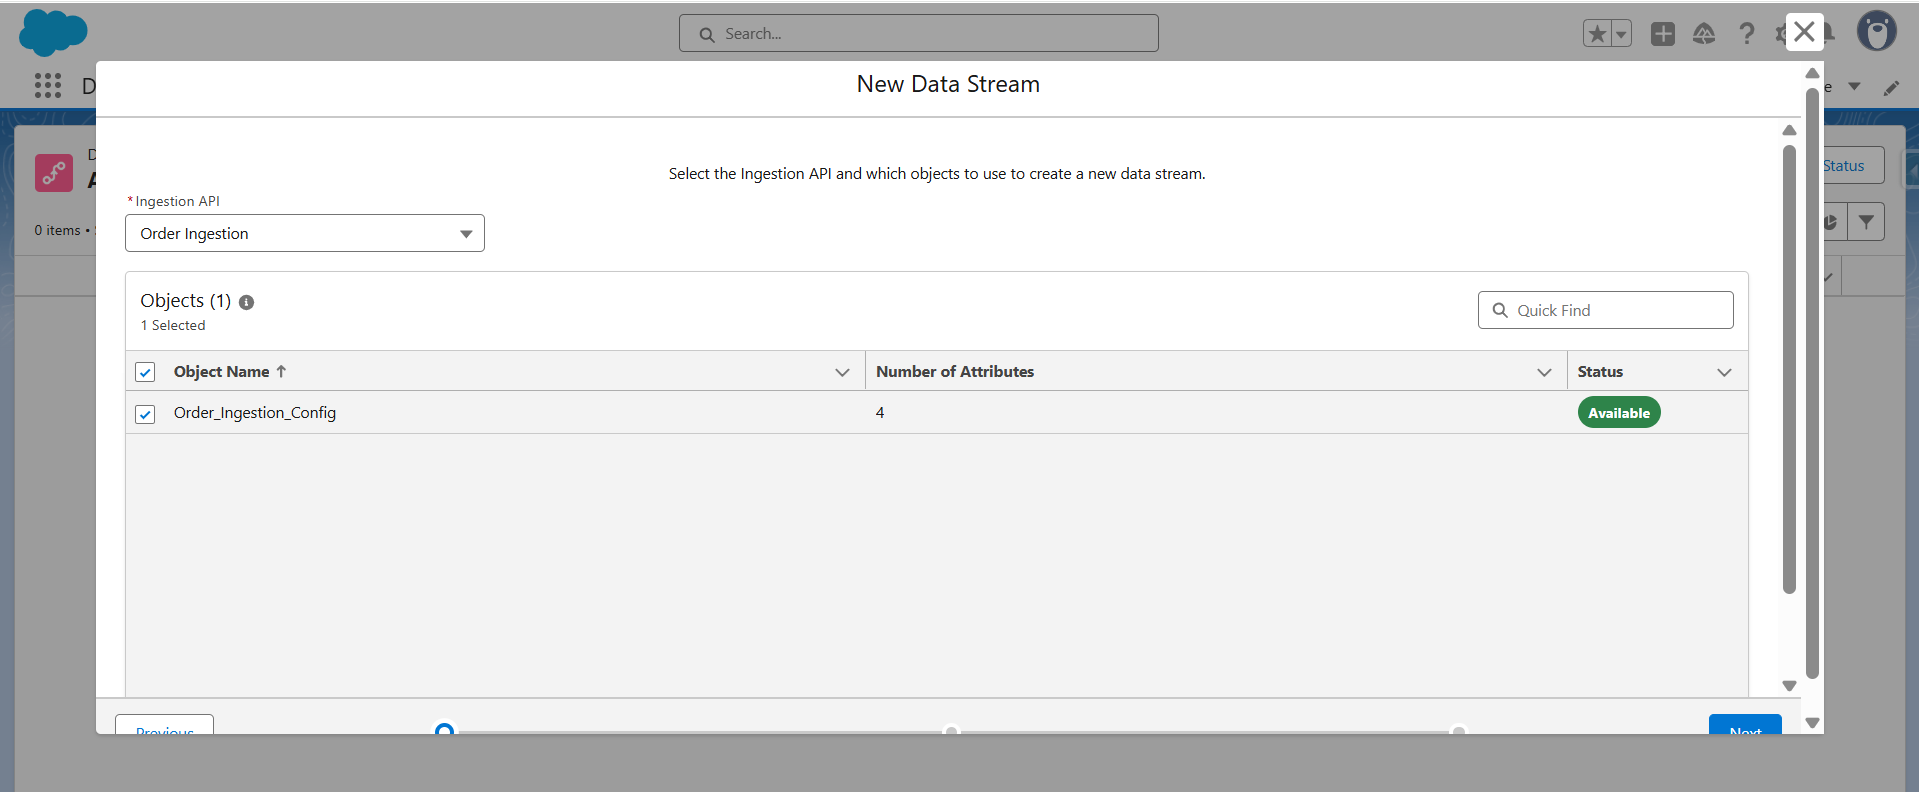
- Configure the object:
Category → Engagement
Primary Key → orderId
Event Time Field → orderDate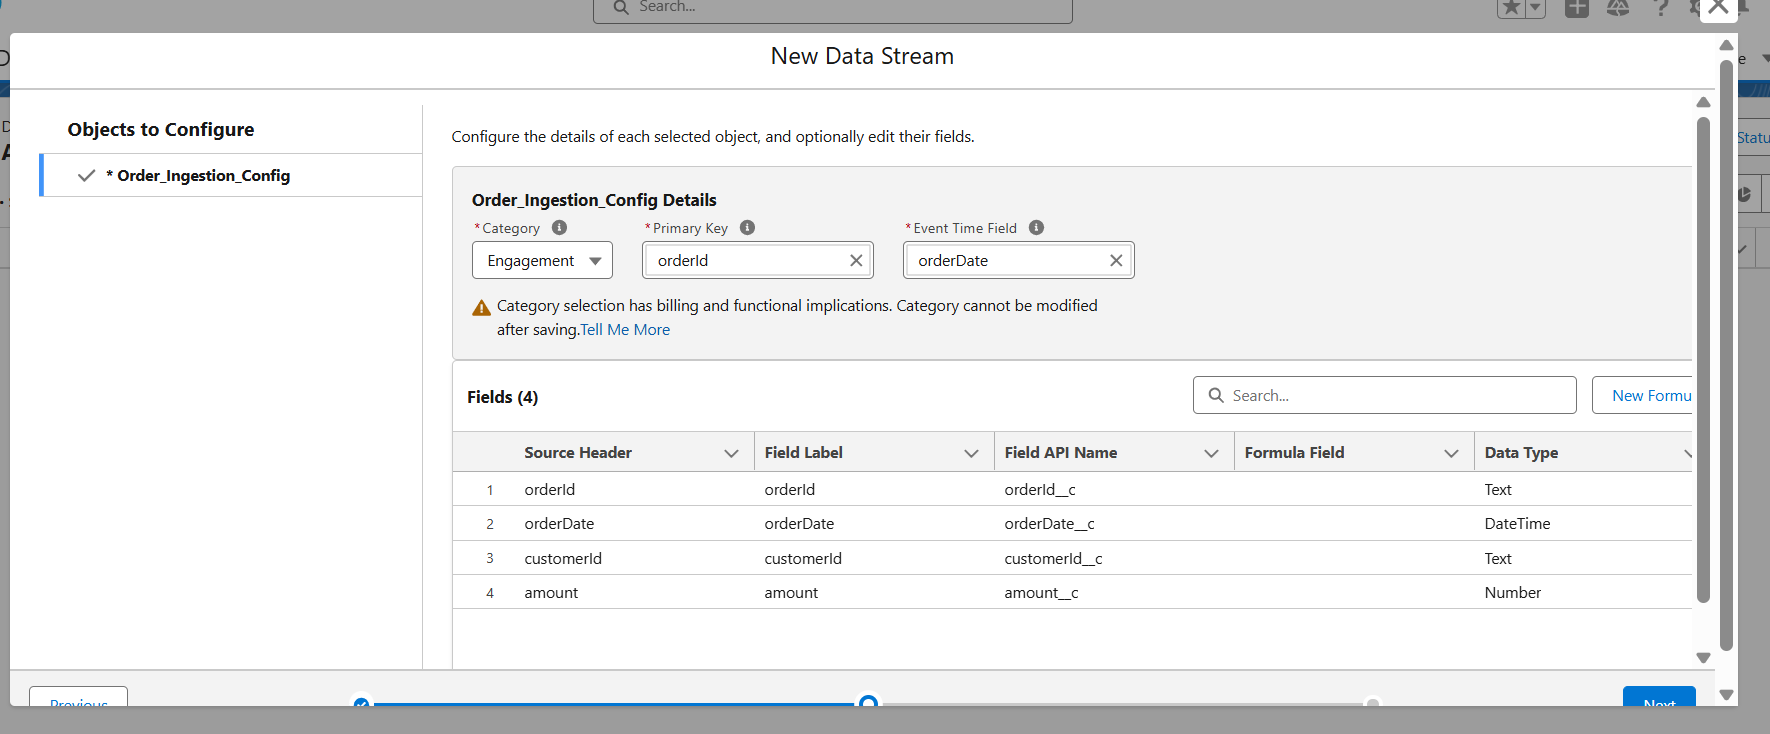
- Map fields if needed, then click Next and Deploy the data stream.
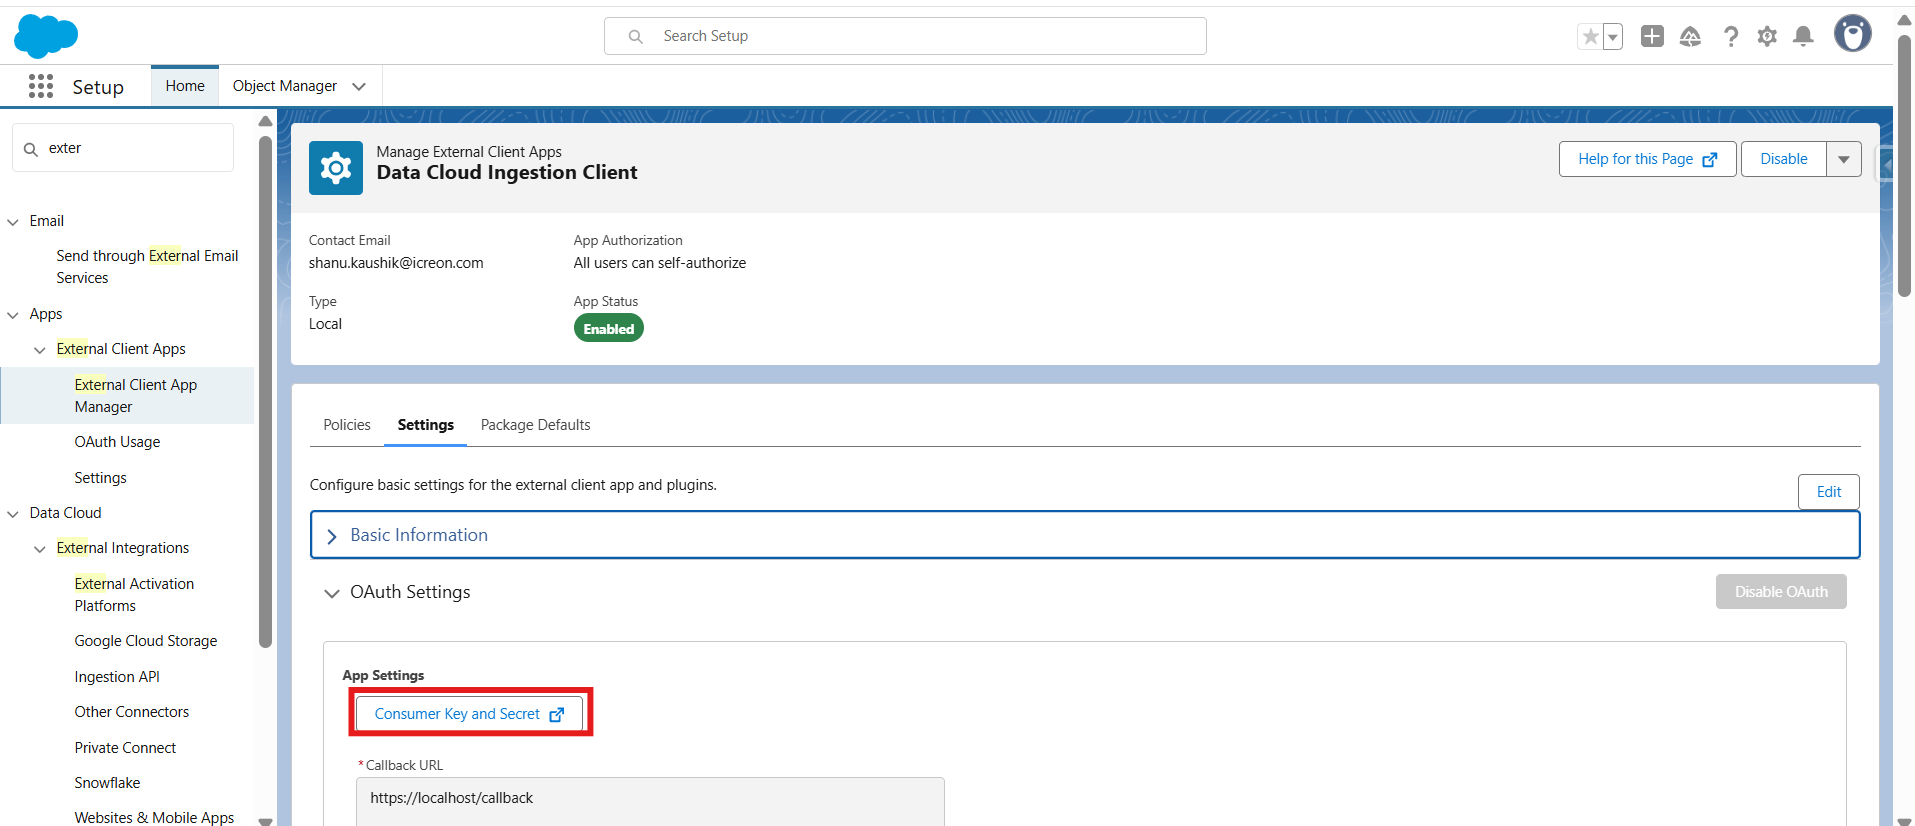
Step 4: Create a Connected App
- Go to Setup -> External Client App Manager
- Create a new Connected App to authenticate external API requests.
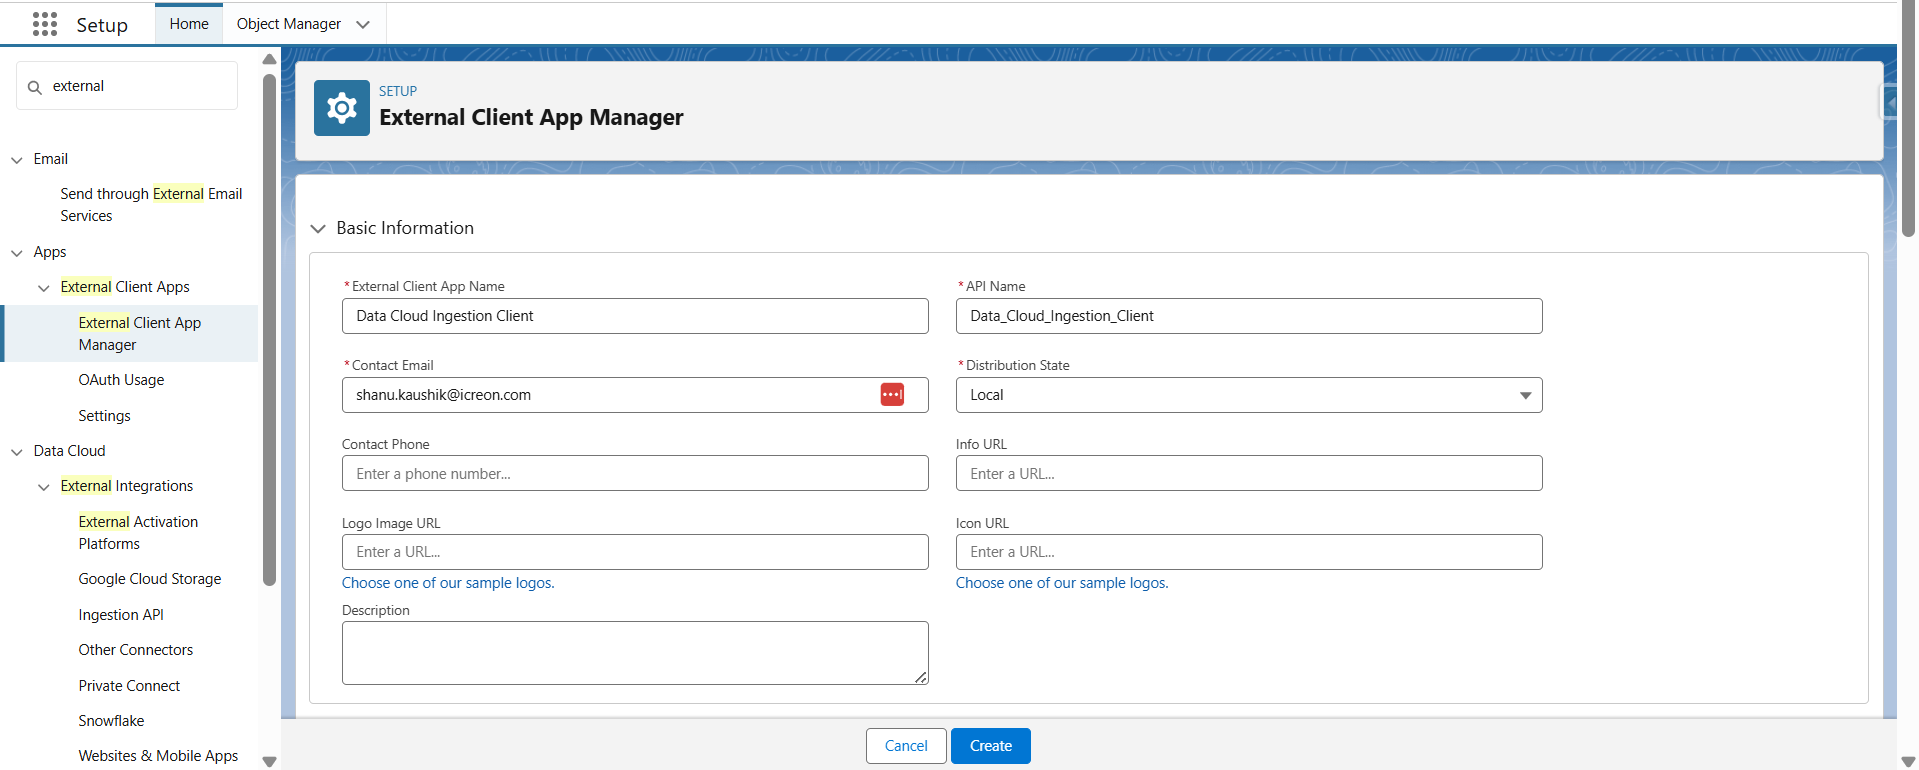
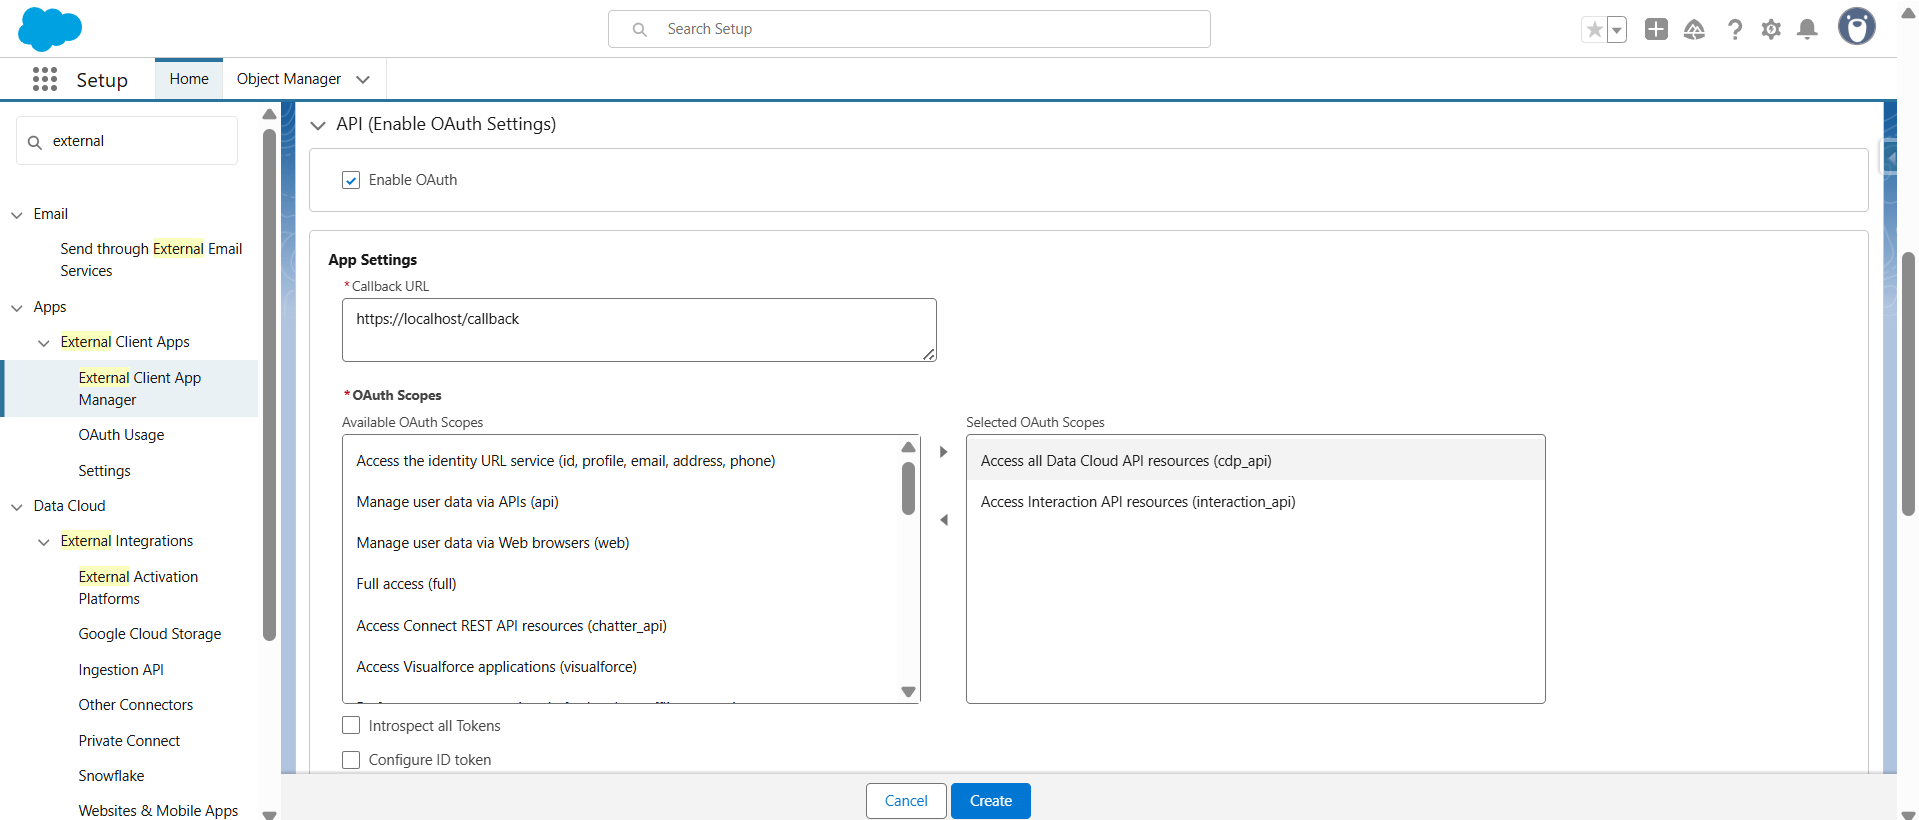
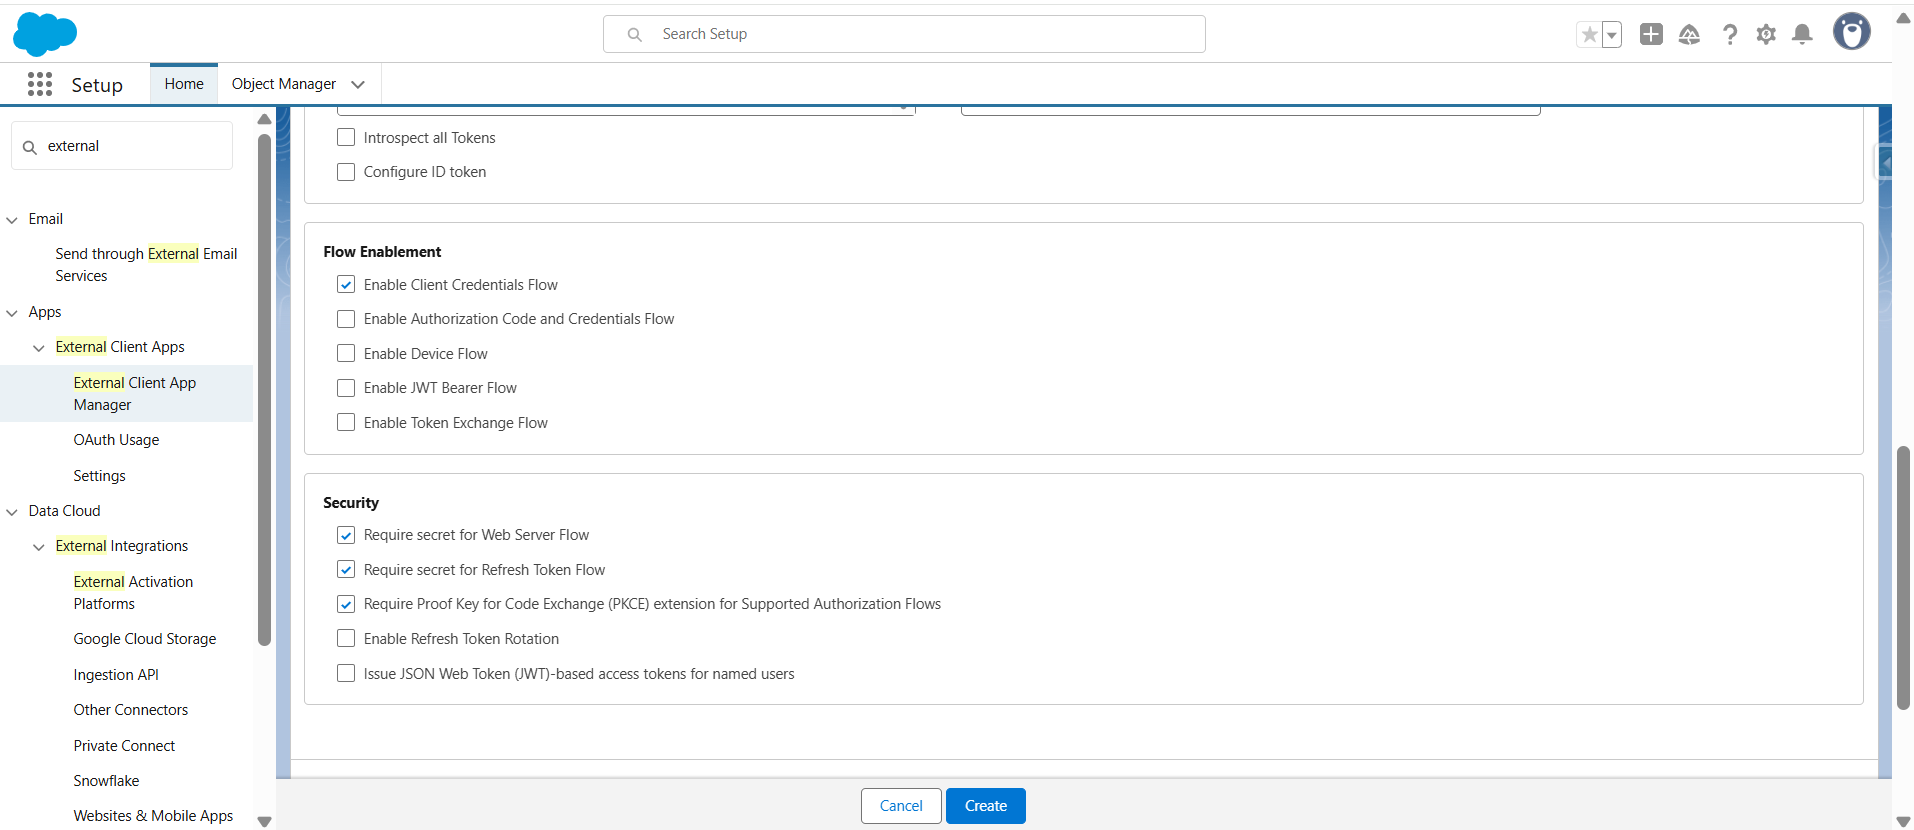
- Capture the Client ID and Client Secret for API calls.
Step 5: Push Data Using API (via Postman to process sample data)
- Use Postman (or any REST client) with the connected app credentials to authenticate.
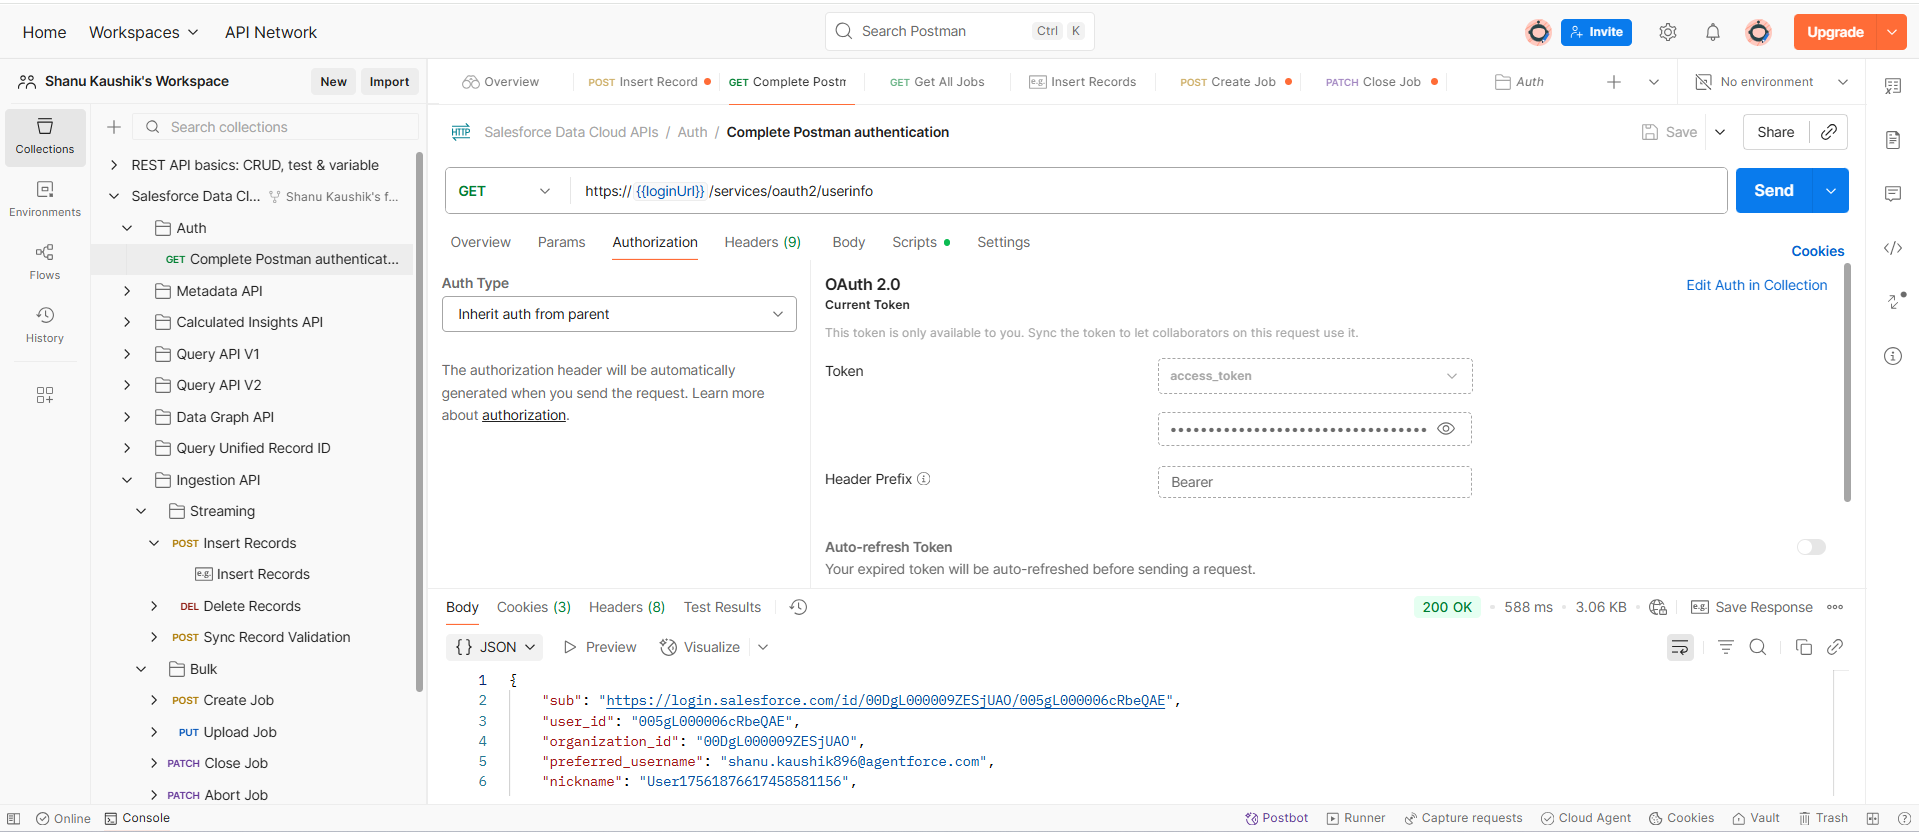
- Call the Ingestion API endpoint with OMS order data payloads.
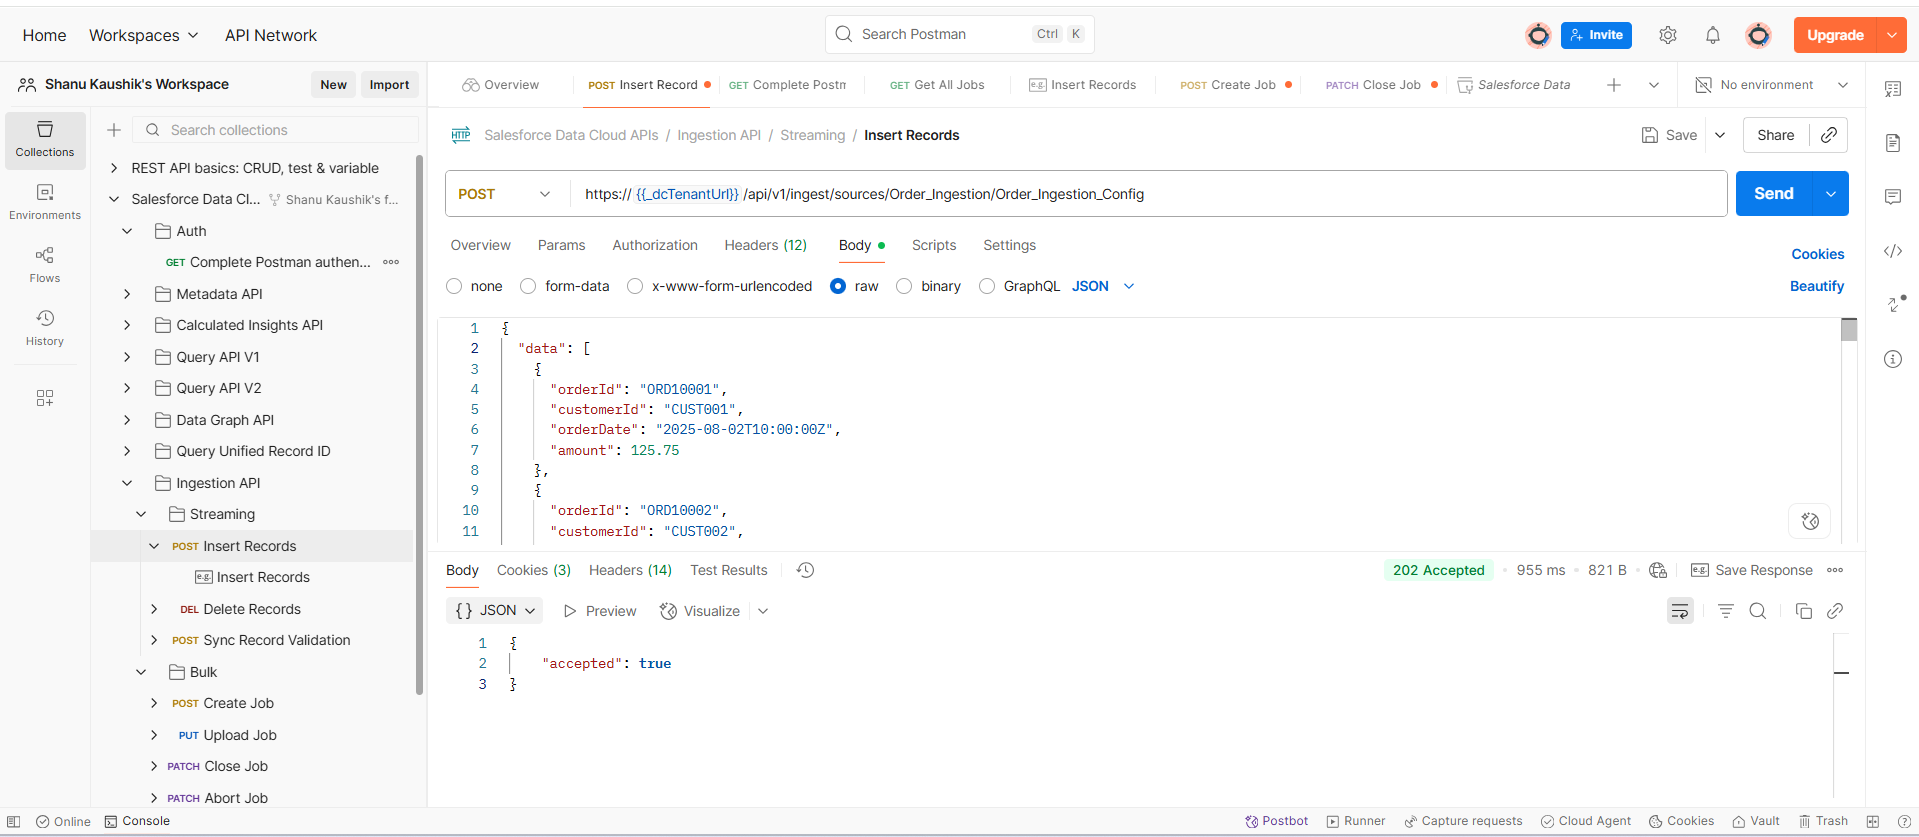
- Verify records in Data Cloud by checking the deployed data stream.
Go to App Launcher -> Data Cloud -> Data Explorer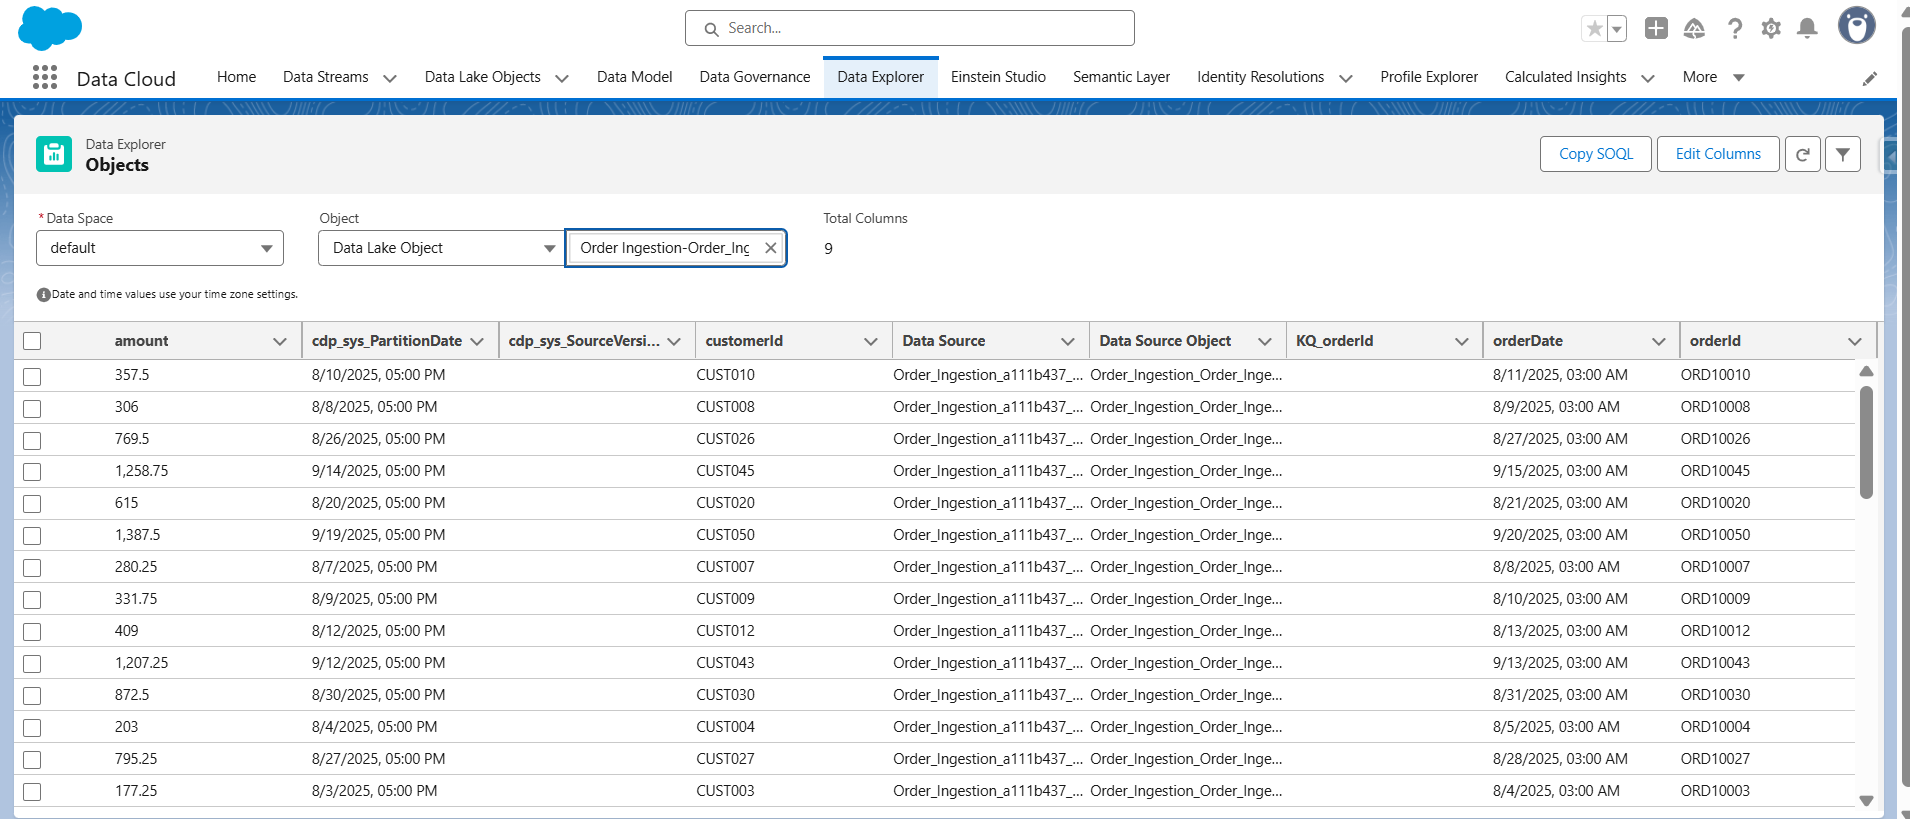
- The data streams are mapped with the data that we posted from the postman.
Conclusion:
By using the Ingestion API, we were able to stream order data from our OMS directly into Salesforce Data Cloud—without relying on any additional systems or connectors. Through a few key steps—creating the connector, uploading a YAML schema file, setting up the data stream, and testing the integration with Postman—we ensured that data flows smoothly and securely from the OMS into Data Cloud. This setup not only simplifies the integration process but also enables real-time access to customer purchase data for smarter decision-making.
Want to explore bulk data ingestion?
Click here to check out the next part of this post, where we dive into how to send large volumes of data into Data Cloud using the Bulk Ingestion method.


